Introduction
This document contains information on the download of the release version, how to set up INTER-Mediator for development, and how to use INTER-Mediator in web applications which have already been produced. INTER-Mediator's source code is open to the public on GitHub. We recommend installing the contents of the repository for use in general development. Also, once an application has been completed, it is simple to use the INTER-Mediator designed for actual operation compressed with JavaScript, but there will be an improvement in efficiency. This document explains how to do these things.
Download
Please see here for the release version of INTER-Mediator. The repository is updated every day, a version number is assigned depending on the fixed functions, and it is opened to the public as the release version. The newest version is Ver.7 and Ver.5.12
Using the version from the repository for development
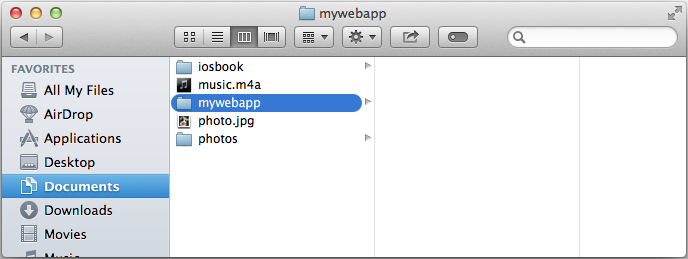
What we recommend is using the version from the repository for general development, and moving to a specifically built version when you actually deploy your application. It can be difficult to use Git, but even if you are not familiar with it, please try to follow the procedure below. Also, the procedure below is a general method that uses command lines, but the procedure is identical when using the GitHub application. First, all the files for the web application have to be collected and placed in a folder. Please make a folder for this. Below, we have made a folder called mywebapp under Documents.
Next, we will go to the INTER-Mediator page on GitHub. It would be best to have an account and sign in, but it is possible to download the source code without an account. Once here, please confirm that the branch in the area at the middle right hand side is set to master. Now, please copy the HTTPS clone URL on the right hand side. You can copy it by clicking on the button on the right where the URL is faintly visible.

Then, please open the terminal. We will perform operations as follows. Everything after # is a comment. Please designate a file path in accordance with the folder that you created.
cd ~/Documents/mywebapp # Make the web application folder current.
git clone https://github.com/INTER-Mediator/INTER-Mediator.git # Reproduce the repository from the server.
Just doing this is sufficient. When you do this, an INTER-Mediator folder will be created in the mywebapp folder. This INTER-Mediator folder will be the main body of the framework. It is okay to create, for example, an index.html file, or an application html/php file at this level. Afterwards we will copy this to the server to confirm the operation.
Here, referring to the INTER-Mediator we downloaded from the repository, we will make a description file context.php as in the following example.
<?php
require_once('INTER-Mediator/INTER-Mediator.php');
IM_Entry( .... );
?>
Furthermore, there is a sample file in the Samples folder, inside the INTER-Mediator folder. When there is a new source code added to the repository, if you insert the following comment, you can acquire the latest version. You should set the INTER-Mediator folder to current, and use git pull.
cd ~/Documents/mywebapp/INTER-Mediator
git pull
Just to explain for the sake of clarity, it is very rare to use a pull command to update to the latest version, and it is more often used to bring in an amendment from a different repository. From the viewpoint of maintaining the source code, this is not a simple update, but to look at it as someone who uses the source code, it is generally thought to be an acceptable update command. In the case that you amend the source code of the framework by yourself, it is not a simple matter, so here the source is provided only for reference and not to be touched, and we will finish the explanation here.
Git has a multitude of functions, and what has been explained so far is really only the tip, but we think that you will be fine for the time being if you just understand this much. If you commit the results of the framework amendments, or you will also have to enter commands or use an application, but if you are only extracting something, then there will rarely be any more procedures than what is mentioned above.
Of course, if you happen to discover a bug in the framework during development, please send us a report. We will deal with it as soon as possible. If your are working with a clone of the repository, then after we have dealt with the bug, just use git pull to conclude the matter.
Using the GitHub application in OS X
For those of you who strongly prefer not to use command lines, we ask that you please obtain and install the GitHub application. Then please complete the setup process. GitHub requires you to log in, so assuming that you have an account, please use that account to log in.
There is a "Clone in Desktop" button on the GitHub page, so the GitHub application will start up when you click that, and immediately ask where to create your INTER-Mediator folder. Once there, you only need to select the location you prepared, and press the Clone button. After that, in the GitHub application, choose the Change button from the left hand side, and and if you click the Sync button at the top right, it will download and update with the newest version of the repository from the server.

However, using this method, if you try to create a second clone using the same account, the first repository you created will be displayed in the GitHub application, and you won't be able to create a new repository. In that case, please use commands to create a new clone. After that, we will take a look at the repository menu. At the far left of the GitHub application's title bar, you can click on "Repositories". Then click on the "+" button at the bottom of the window, and choose "Add Local Repository". Then indicate the folder for the clone you created using commands, and you will be able to register multiple entries with INTER-Mediator. Otherwise, take the repository folder and drag it into the window containing the repository menu to append it. However, you may not be able to differentiate the repositories in the list, so please right click on the repository list, select "Show in Finder", and confirm the folder to ensure that you don't make any mistakes in your work.
Using the GitHub application in Windows
Windows also has a GitHub application, so of course you can also use that to create a clone and perform updates. However, when you press the "Clone Desktop" button on the site, it will not start up the GitHub application and begin doing something, you will only see some information about the application. Therefore, to create your first clone, select that item from the account menu on the left hand side of the application, and choose "Clone" from the button menu on the right.
If it doesn't appear no matter what, use the Git Shell function to call a command line, set the place where you want to create a clone as the current directory, and enter the command "git clone https://github.com/INTER-Mediator/INTER-Mediator.git". In order to use the GitHub application to confirm the clone created by the command line, drag and drop the folder into the application window.

After creating a clone, a sync button will appear at the top when you display the repository details. You can perform an update simply by pressing this button.

Using the downloaded version for development
If you click the "Download ZIP" button on the right hand side of GitHub's INTER-Mediator page, it will compress and archive all the current files in the repository and download them. If the branch is a master, the unzipped folder will be named INTER-Mediator-master. You can now change the folder name as appropriate and move it to the folder you are using for development in the application.
Of course, this is easy at first, but it means that the folder will be detached from the repository, so if there are updates to the repository, you will have to carry out this same procedure each time.
Creating an INTER-Mediator for deployment
We will be developing using the results taken from the repository, so you should be able to do actual work in that condition. Also, if you use the following method to create a build, samples and other materials unnecessary to the actual operation will be removed, and the JavaScript programs will be compressed into one file, which will be advantageous to performance.
First, as preparation, in the same folder as the INTER-Mediator folder which was taken from the repository, please deploy Minify folder with "git" command.
git clone https://github.com/INTER-Mediator/INTER-Mediator.git
git clone https://github.com/matthiasmullie/minify.git
To create an INTER-Mediator including the original version and today's date, please use the script dist-docs/buildup.sh. For example, if the INTER-Mediator directory is set as the current directory, on a Mac or a UNIX-based OS, please input the data as follows.
cd INTER-Mediator/dist-docs/
./buildup.sh
On the other hand, on a Windows system, please use Cygwin. Drag and drop the buildup.sh file into the Cygwin terminal window, and simply press the return key in the Cygwin terminal. Furthermore, if you want to specify the drive path, in Cygwin, look at /cygdrive/c/, and this is the path which denotes the C:¥ drive root.
If you do that, a message such as the following will be displayed in the terminal. Here, please type either 1, 2, 3 or 4, and press the return key. You can choose from these kinds of build, but (2) is the smallest configuration, so it is usually best to select that one. (3) contains samples of the user certificate management page, a definition file editor and such. Furthermore, regarding the certification application, we recommend developing an original based on the contents of the Autu_Support folder.
$ ./buildup.sh
=================================================
Start to build the INTER-Mediator Ver.5.6
-------------------------------------------------
 Original: /Users/msyk/Documents/INTER-Mediator_develop/INTER-Mediator
 Build to: /Users/msyk/Documents/INTER-Mediator_develop/im_build/INTER-Mediator
 Path of minifier: /Users/msyk/Documents/INTER-Mediator_develop/minify
-------------------------------------------------
Choose the build result from these:
(1) Complete (everything contains)
(2) Core only (the least set to work wep applications)
(3) Core + Support (add Auth_Support and INTER-Mediator-Support)
(4) Write just version and release date to metadata.json
Type 1, 2, 3 or 4, and then type return---->
If you have the file Minify folder in the same folder as the INTER-Mediator folder, use this to compress the JavaScript programs. If you do not have this, then without compressing them, simply collect the various JavaScript files into one.
Following that, as stated in the message, in the same layer as the INTER-Mediator folder, there should be an "im_build" folder, and the INTER-Mediator folder is inside that. Inside these files are only the most essential things needed for operation. This im_build/INTER-Mediator folder can be used to replace the current INTER-Mediator folder.
However, there is one point to be careful of. The INTER-Mediator that you built collects all the JavaScript programs into an INTER-Mediator.js file, and any other js files will be deleted. If you upload to an FTP at that point, those js files which should have disappeared will still be there. Therefore, the best thing to do is to upload after deleting the INTER-Mediator folder on the server. If you think an operation is behaving strangely, please check if there are JavaScript files aside from INTER-Mediator.js on the server.
Regarding the version number, it is described at the start of the buildup.sh file, so please change that when you use it. Furthermore, the version rules are as follows.
- In the version number, integers should be divided with a period. (Example: 3.4, 3.11)
- For the version notation, the standard is Ver., but v, Version or version are also acceptable.
- Versions with two integers will be considered an "Official Version". (Example: 3.4, 3.11)
- When a developer creates an original version, a third integer must definitely be added. (Example: 3.4.1, 3.11.133)
- When a developer creates an original version, other additions can be made. (Example: 3.4.1-rev.21)
In other words, when you download INTER-Mediator and actually load it into an application and make amendments, please add a third integer as a branch number. If possible, after you commit/push that condition, if you add a version tag, it can be used for your own backup purposes. To ensure that your version numbers do not overlap with other developers, please check the repository before adding a number. Also, the third column can skip numbers. This rule is quite lenient.